Have you ever wanted to design a floor plan but felt overwhelmed by complicated design software? You're not alone. Many homeowners, renovators, real estate investors, and DIY enthusiasts ask the same question: how can I design a floor plan without software?
The good news is that creating a floor plan without software is completely possible. In fact, many professional architects and designers begin with simple hand-drawn sketches before moving to digital tools. With a measuring tape, graph paper, a ruler, and a clear vision of your space, you can create a surprisingly effective floor plan by hand.
how can i design a floor plan without software?
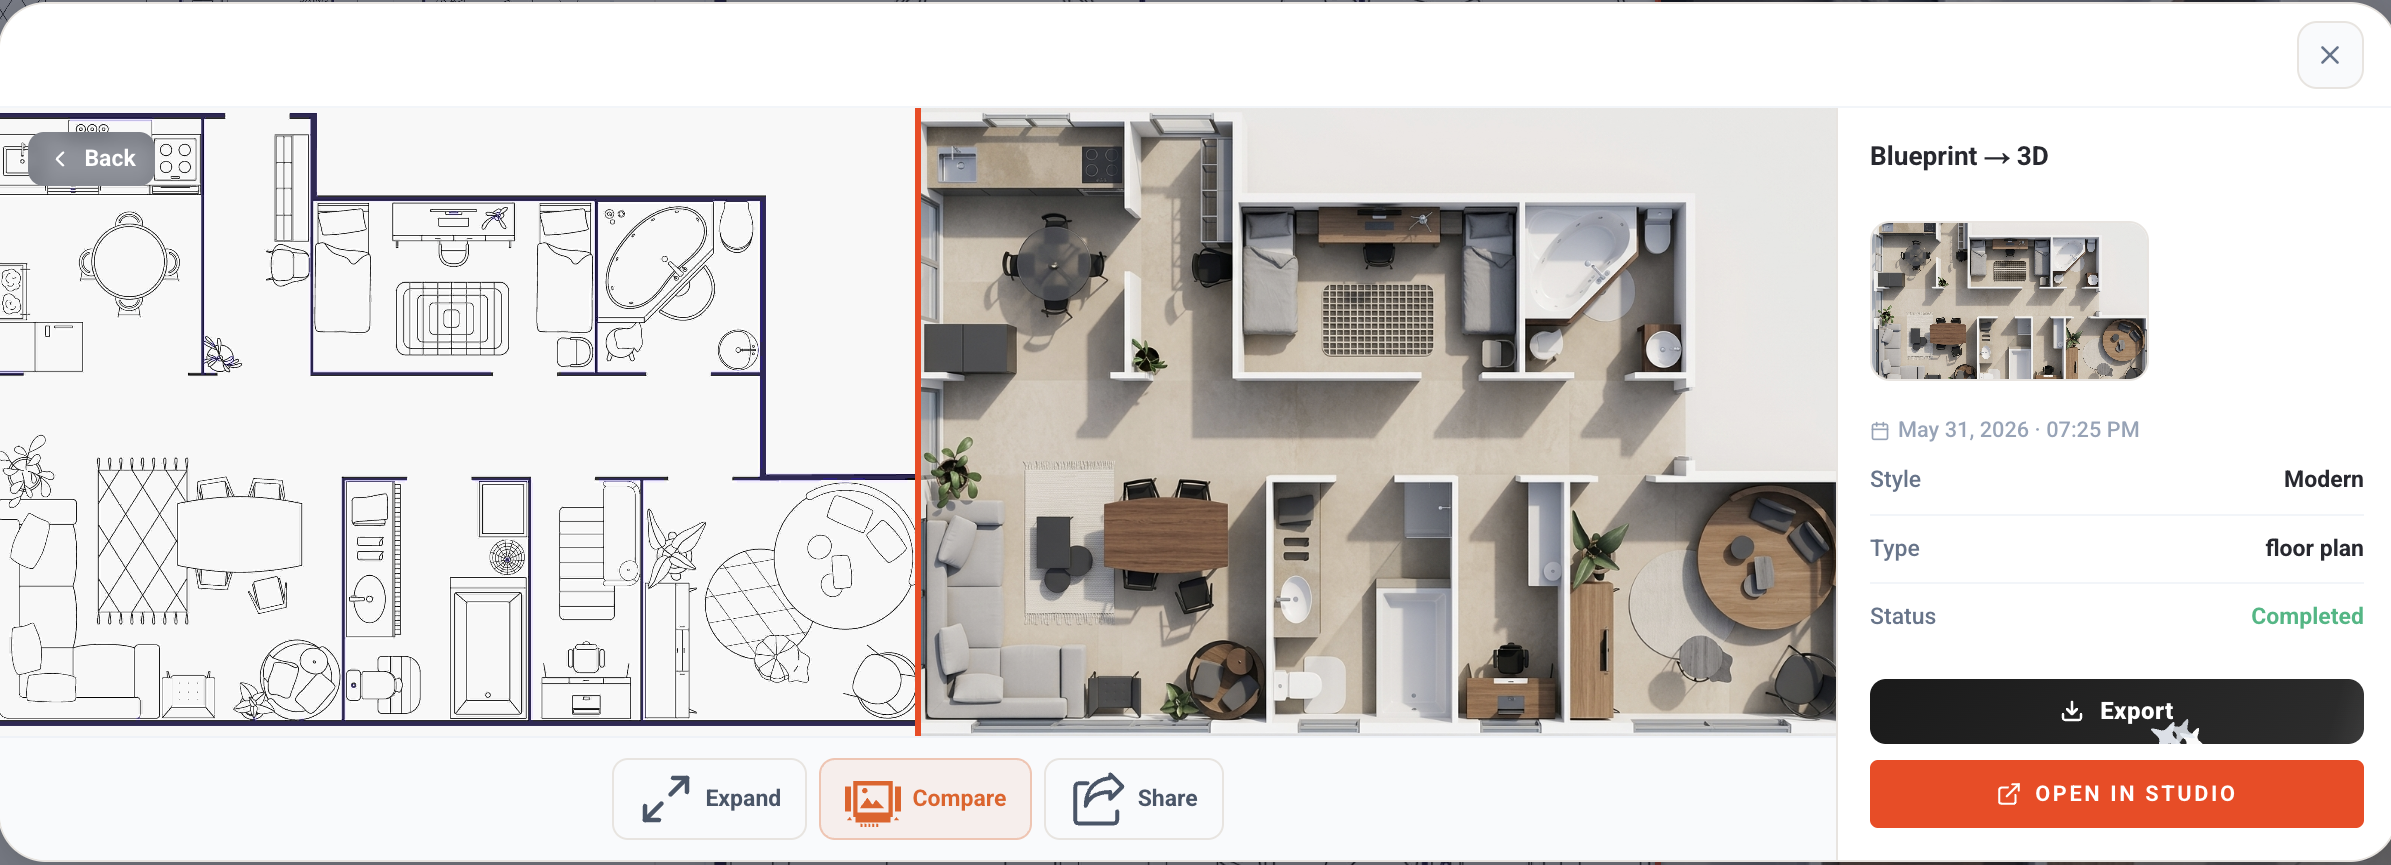
However, while a hand drawn floor plan is an excellent starting point, it often becomes difficult to make revisions, visualize room layouts, or see how the finished space will look in real life. That's why many people start by sketching their ideas manually and then use a floor plan generator to convert those ideas into professional 2D and 3D designs.
Have a Sketch Already?
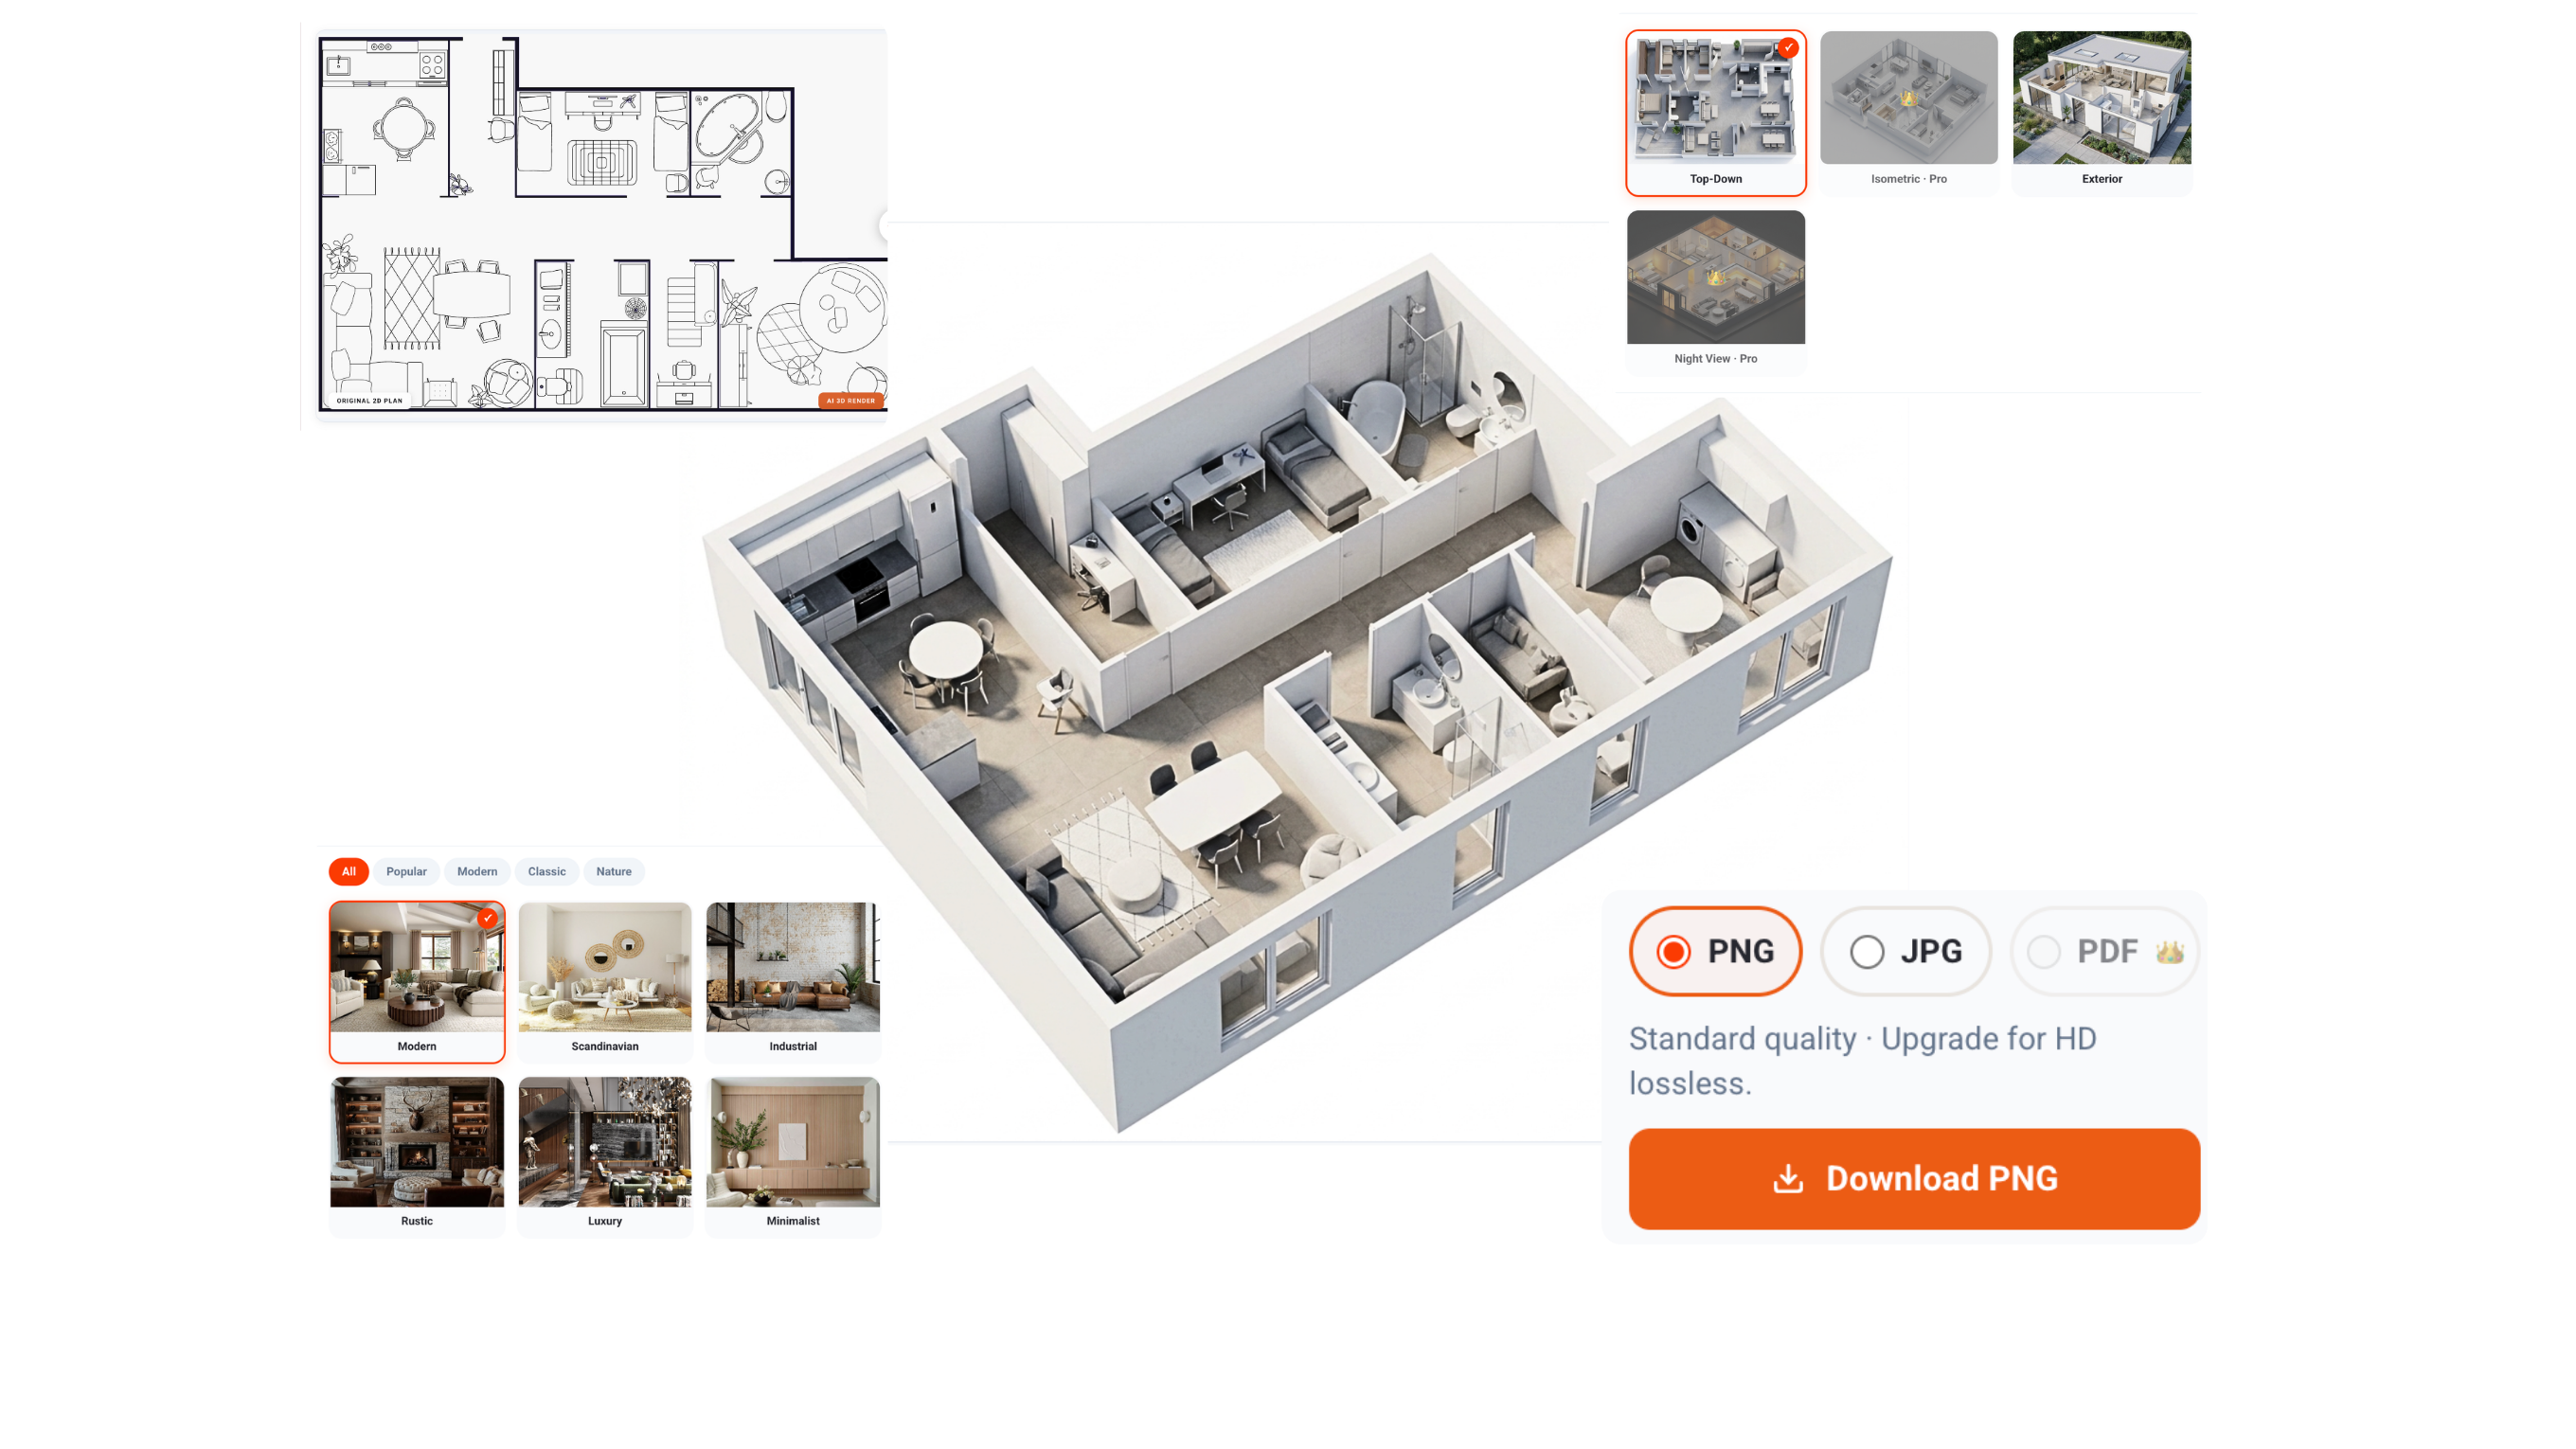
Instead of spending hours redrawing measurements and correcting mistakes, you can upload your sketch and instantly generate a professional floor plan. Our platform helps users convert rough sketches into accurate digital layouts and even transform a 2D floor plan into a 3D model for better visualization.
Whether you're designing a new home, planning a renovation, or simply exploring ideas, this guide will show you exactly how to create a floor plan without software while also explaining how to upgrade your design when you're ready.
Can You Really Design a Floor Plan Without Software?
Yes, absolutely.
Before modern floor plan creators existed, architects and builders designed homes entirely by hand. Even today, many professionals start with quick sketches on paper because it allows them to explore ideas without worrying about software settings or technical tools.
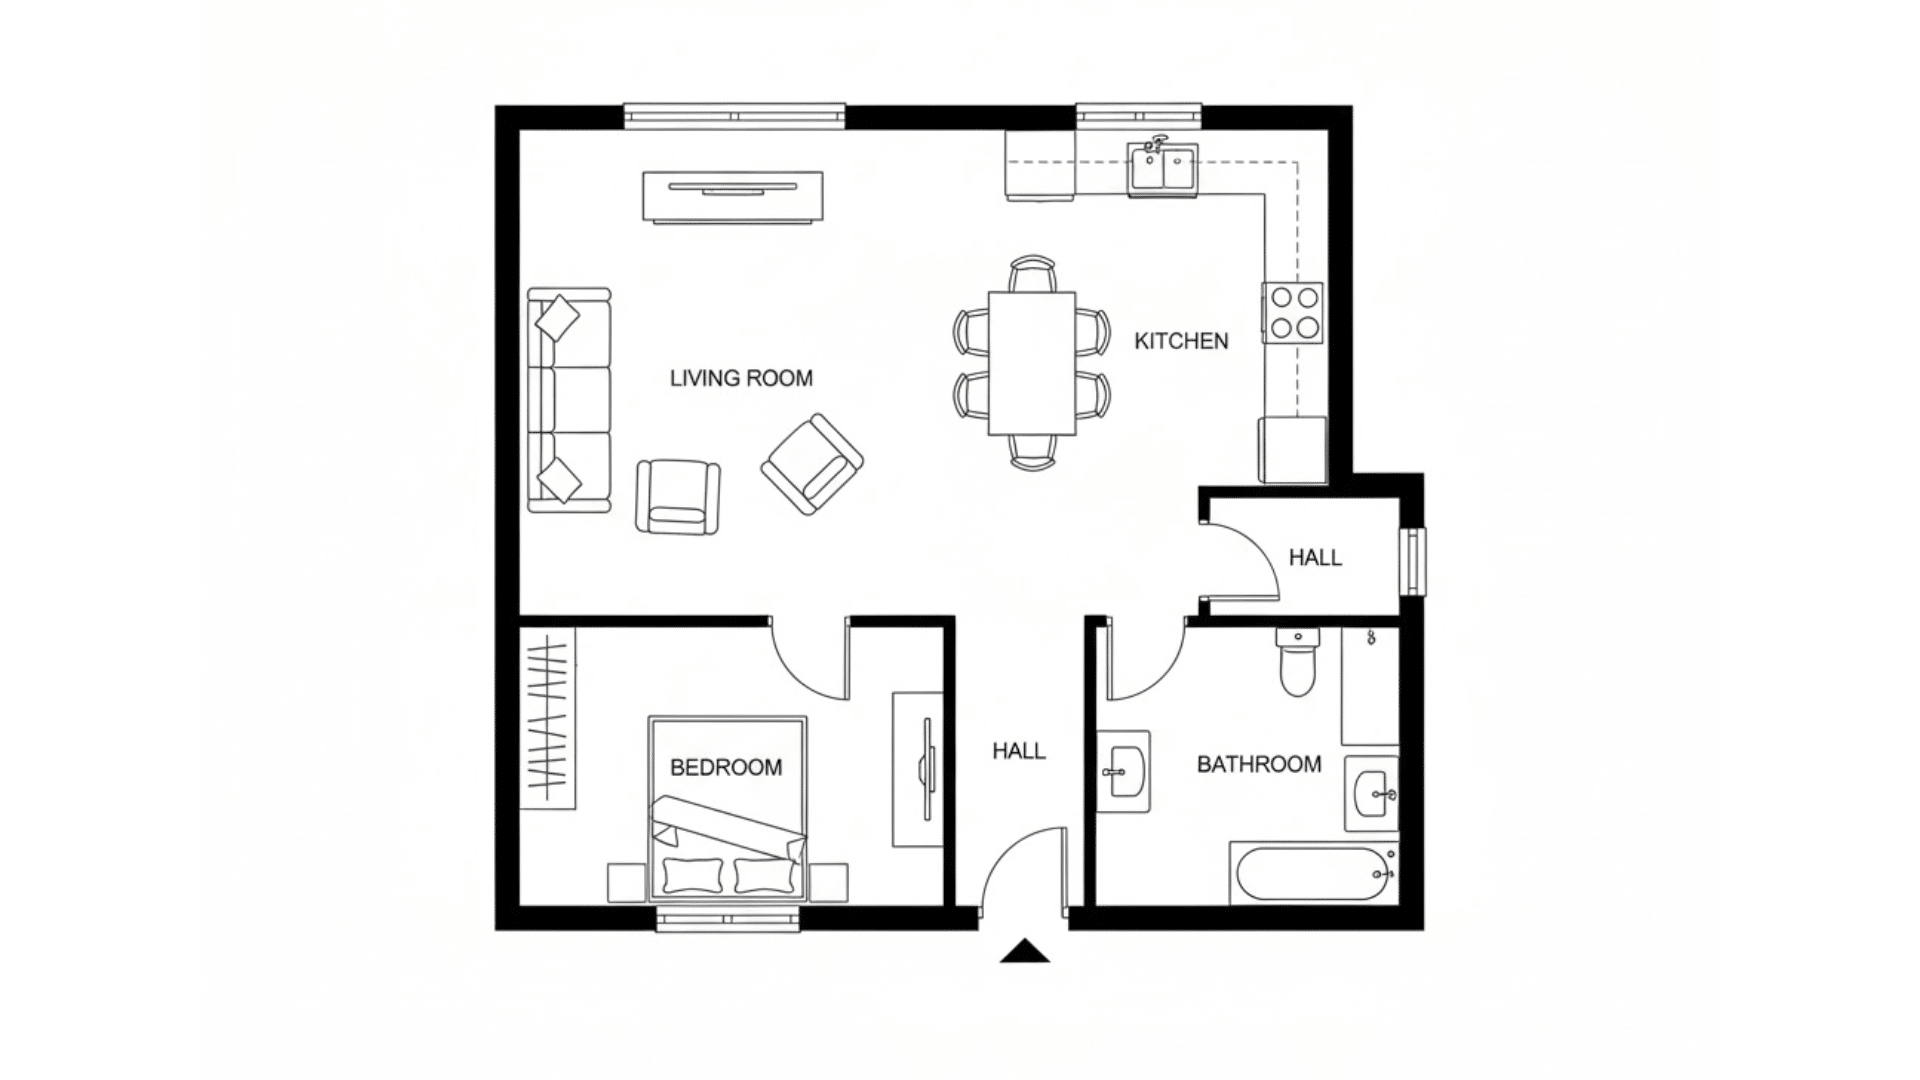
A manually created floor plan can help you:
Plan room layouts
Explore furniture arrangements
Visualize traffic flow
Prepare for renovations
Discuss ideas with contractors
Create a rough house floor plan design
The key is understanding that manual floor plans work best during the brainstorming stage.
For example, imagine you're planning a home extension. You may start by sketching where the new bedroom, bathroom, or office should go. This allows you to quickly test different ideas without opening a design application.
However, as your design becomes more detailed, challenges begin to appear:
Measurements become harder to manage
Room proportions can become inaccurate
Making changes requires redrawing sections
Sharing plans with builders becomes difficult
Visualizing the finished home is nearly impossible
This is where modern floor plan tools provide a significant advantage.
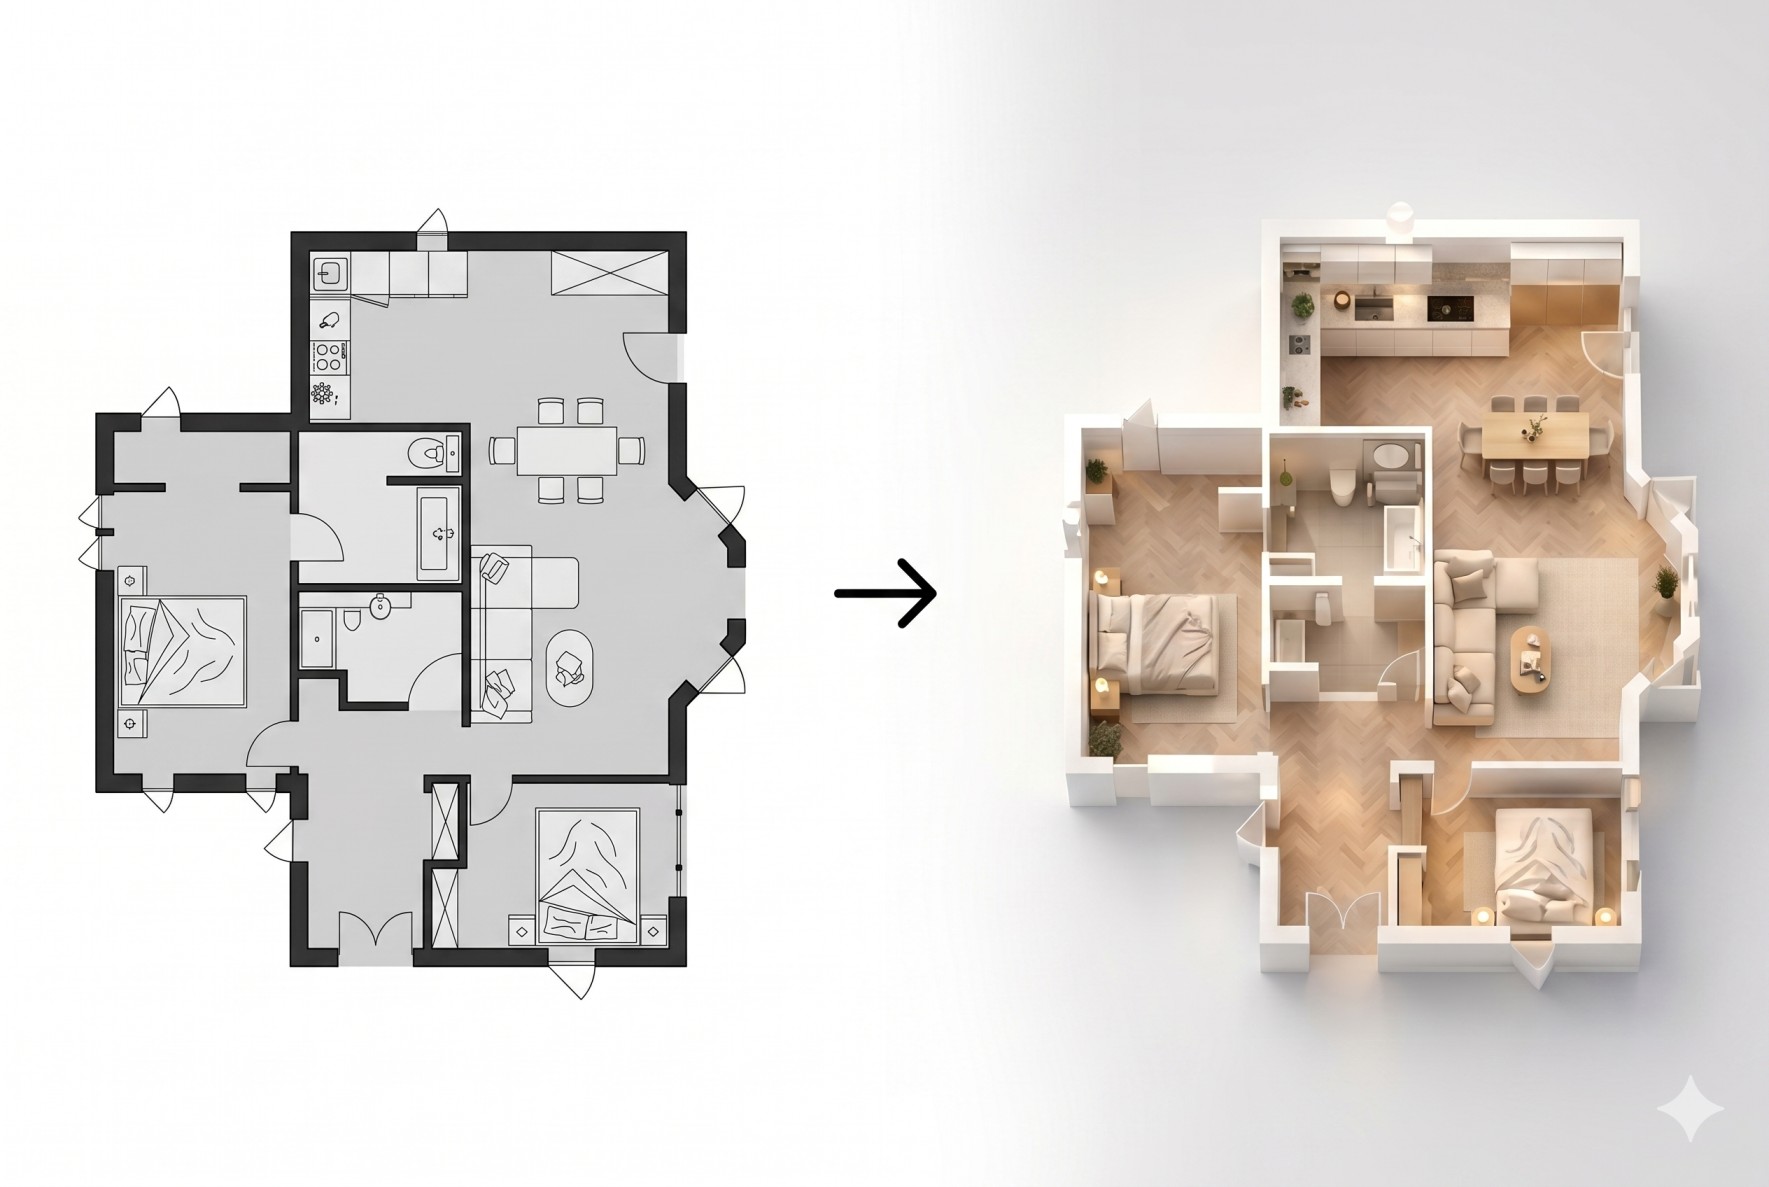
Many homeowners now use a hybrid approach:
Draw a floor plan by hand.
Upload the sketch.
Generate a digital floor plan.
Convert the design into a realistic 3D floor plan.
This process combines the flexibility of manual planning with the speed and accuracy of modern technology.
If your goal is to quickly create a floor plan without software, starting on paper is often the easiest option. But if you eventually want professional-quality results, converting your sketch into a digital floor plan can save hours of work.
What You'll Need Before Drawing a Floor Plan
Before learning exactly how to design a floor plan without software, gather the right materials.
Fortunately, you don't need expensive equipment.
Graph Paper
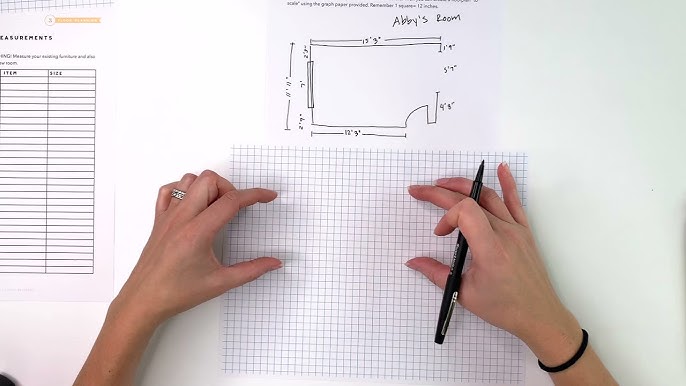
Graph paper is one of the most useful tools when creating a floor plan manually.
The grid helps maintain consistent proportions and makes scaling much easier. Many people use graph paper to create a floor plan because each square can represent a specific real-world measurement.
For example:
1 square = 1 foot
1 square = 0.5 meters
Using a consistent scale helps prevent sizing mistakes later.
Measuring Tape
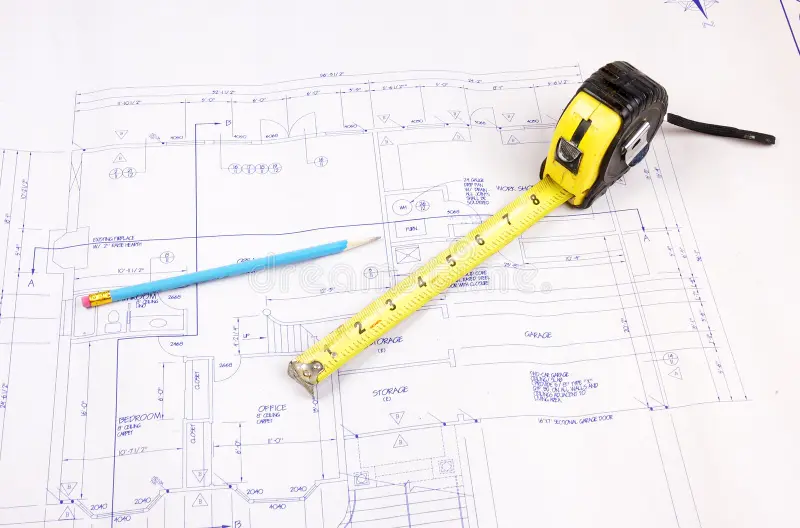
Accurate measurements are the foundation of every successful floor plan.
Measure:
Exterior walls
Interior walls
Door widths
Window widths
Hallways
Staircases
Even small measurement errors can create major problems when translating your sketch into a digital floor plan.
Pencil and Eraser
A pencil is essential because floor plans often require adjustments.
Expect to erase and redraw multiple times as you improve your layout.
Professional designers rarely get their first sketch perfect, so don't worry if your initial floor plan changes significantly.
Ruler
A ruler helps keep walls straight and improves the overall appearance of your design.
Clean, straight lines make your floor plan easier to understand and easier to convert into a professional digital format later.
Room Requirements List
Before drawing anything, write down every room you need.
Example:
Living Room
Kitchen
Dining Area
Master Bedroom
Guest Bedroom
Bathroom
Laundry Room
Home Office
Having a list prevents important spaces from being forgotten during the planning process.
Existing Property Measurements
If you're redesigning an existing home, gather all available measurements before you begin.
This makes it much easier to create an accurate floor plan sketch and eventually generate a professional floor plan using an online floor plan generator.
In the next step, we'll cover the most important part of the entire process: measuring your space accurately and avoiding the mistakes that cause most hand drawn floor plans to fail.
Step 1: Measure Your Space Accurately
If you're wondering how can I design a floor plan without software, accurate measurements are the most important part of the entire process.
Even the most beautiful floor plan sketch becomes useless if the dimensions are incorrect. Whether you're creating a new home layout, planning a renovation, or preparing a hand drawn floor plan for digital conversion, starting with precise measurements will save time and frustration later.
Begin With the Exterior Walls
Start by measuring the outer boundaries of your home, room, or building.
Record:
Total width
Total length
Wall thickness (if possible)
Any exterior projections or recesses
Draw a rough rectangle on paper and write the measurements beside each wall.
Image Opportunity: Exterior wall measurement example.
At this stage, don't worry about making your drawing look perfect. The goal is simply to capture accurate dimensions.
Measure Every Room
Next, move room by room throughout the property.
For each room, record:
Width
Length
Ceiling height
Window positions
Door positions
Many beginners only measure wall lengths and forget important details such as windows and doors. These elements significantly affect how a floor plan functions and should be included from the beginning.
Pro Tip
Measure each wall twice.
Small errors often create major layout issues later when converting a floor plan sketch into a professional digital floor plan.
Record Door and Window Locations
Doors and windows affect:
Furniture placement
Natural light
Traffic flow
Room functionality
Measure:
Door width
Distance from corners
Window width
Window height
Window placement
These details will make your floor plan far more useful if you later decide to generate a floor plan online.
Don't Forget Fixed Features
Many people creating a floor plan manually overlook permanent elements such as:
Staircases
Columns
Fireplaces
Built-in cabinets
Structural walls
These features can dramatically affect your layout options.
Common Measurement Mistakes
Avoid these common errors:
❌ Measuring only one side of a room
❌ Forgetting wall thickness
❌ Ignoring stair dimensions
❌ Missing window locations
❌ Not checking measurements twice
A few extra minutes spent measuring carefully can save hours of corrections later.
Why Accurate Measurements Matter
When homeowners upload a sketch to create a digital floor plan, accurate measurements help ensure:
Better room proportions
Realistic layouts
Easier furniture planning
More accurate 3D floor plans
The better your measurements, the better the final result.
Step 2: Choose the Right Scale for Your Floor Plan
Once measurements are complete, the next step is choosing a scale.
A scale allows large spaces to fit onto a piece of paper while maintaining accurate proportions.
Without a scale, your floor plan can quickly become distorted.
What Is a Floor Plan Scale?
A scale is simply the relationship between your drawing and real-world dimensions.
For example:
1 inch = 4 feet
1 cm = 1 meter
1:50 scale
1:100 scale
This means every measurement on paper represents a larger measurement in reality.
Best Scales for Beginners
For most homeowners creating a floor plan without software, these scales work well:
ScaleBest Use1:50Small homes and apartments1:100Large homes1 square = 1 footGraph paper projects1 cm = 1 meterSimple planning
Graph paper makes scaling significantly easier because each square already provides a visual reference.
Image Opportunity: Scale comparison chart.
Why Scaling Is Important
Proper scaling helps you:
Keep rooms proportional
Avoid oversized spaces
Plan furniture placement
Compare layouts accurately
When people skip this step, they often discover later that rooms look completely different than expected.
Preparing for Digital Conversion
If you plan to convert your sketch into a digital floor plan later, consistent scaling makes the process much smoother.
A well-scaled drawing is easier to interpret and often produces better results when uploaded to an AI floor plan generator.
Step 3: Draw the Exterior Walls
Now it's time to begin creating the actual floor plan.
Start with the outer walls before adding interior rooms.
This creates the foundation for everything that follows.
Create the Building Outline
Using your scale and measurements, draw the outer boundary of the structure.
Take your time.
This outline determines:
Building size
Room placement
Future expansion possibilities
Most professional floor plan creators start with this same approach.
Show Wall Thickness
If possible, represent wall thickness rather than drawing single lines.
This helps:
Improve accuracy
Create realistic room dimensions
Prepare for future digital conversion
Even a basic representation is better than ignoring wall thickness entirely.
Add Structural Features
Before drawing rooms, include:
Chimneys
Stairwells
Support columns
Load-bearing walls
These features often limit room placement options and should be considered early.
Image Opportunity: Blank page → Exterior walls → Complete structure outline.
Evaluate the Shape
Take a moment to review the outline.
Ask yourself:
Does it match the actual structure?
Are measurements correct?
Is the scale consistent?
Making corrections now is much easier than later.
Quick Tip
Many users start with a rough hand drawn floor plan and then upload it to create a cleaner digital floor plan automatically.
This allows them to focus on ideas instead of spending hours perfecting line work.
Step 4: Add Interior Walls and Rooms
Once the exterior shell is complete, you can begin dividing the space into rooms.
This is where your floor plan starts becoming a realistic representation of how people will live and move through the home.
Start With Major Living Areas
Begin by placing the largest spaces first.
Examples include:
Living room
Kitchen
Dining room
Primary bedroom
These rooms usually have the biggest impact on the overall layout.
Consider Daily Functionality
A beautiful floor plan means nothing if it doesn't function well.
Think about:
Walking paths
Accessibility
Privacy
Natural light
Convenience
For example, placing a bathroom directly beside the kitchen may not be ideal for many homeowners.
Allocate Space Realistically
One of the biggest mistakes beginners make is creating rooms that are either too large or too small.
A practical house floor plan design should balance:
Open spaces
Storage
Comfort
Traffic flow
Avoid allowing one room to consume unnecessary square footage while other spaces become cramped.
Add Secondary Rooms
Once major spaces are placed, add:
Bathrooms
Closets
Laundry rooms
Offices
Storage areas
These supporting spaces significantly affect how comfortable a home feels.
Think About Furniture
As you create a floor plan manually, imagine where furniture will go.
Questions to ask:
Can a bed fit comfortably?
Is there room for a dining table?
Can people walk around furniture easily?
Are doors blocked when opened?
Visualizing furniture placement now prevents problems later.
Review Room Relationships
Good floor plans create logical relationships between spaces.
Examples:
✓ Kitchen near dining area
✓ Bedrooms away from noisy zones
✓ Bathrooms accessible from bedrooms
✓ Laundry room near bedrooms
These small details dramatically improve usability.
The Advantage of Digital Visualization
At this stage, many homeowners realize how difficult it can be to visualize the final result from a simple sketch.
That's one reason digital floor plans and 3D floor plan models have become so popular.
A rough sketch may communicate dimensions, but a digital version helps you see how the entire home works before construction begins.
In the next section, we'll add doors, windows, fixtures, and symbols that transform a basic sketch into a complete and functional floor plan.
Step 5: Add Doors, Windows, and Floor Plan Symbols
At this point, your layout should show the building outline and room arrangement. Now it's time to add the details that make a floor plan useful.
Doors, windows, and symbols help transform a simple sketch into a functional floor plan that builders, contractors, designers, and homeowners can understand.
If you've been asking, "How can I design a floor plan without software?", this step is where your drawing starts looking like a real floor plan.
Add All Doors
Start by marking every doorway.
Include:
Entry doors
Bedroom doors
Bathroom doors
Closet doors
Patio doors
Most floor plans represent doors with an arc showing the direction the door swings open.
This may seem like a small detail, but door swing direction affects:
Furniture placement
Walking paths
Accessibility
Room functionality
Image Opportunity: Floor plan door symbol examples.
Common Door Placement Mistakes
Avoid:
❌ Doors opening into each other
❌ Doors blocking furniture
❌ Narrow hallway access
❌ Poor bathroom entry placement
Many floor plan problems are caused by incorrect door placement rather than room size.
Add Windows
Next, mark every window location.
Windows influence:
Natural lighting
Ventilation
Energy efficiency
Furniture layout
Draw windows proportionally according to their size and position.
For example:
Living rooms often benefit from larger windows.
Bathrooms may use smaller windows for privacy.
Bedrooms typically require balanced window placement.
Image Opportunity: Window placement examples.
Include Fixtures and Built-In Elements
To make your floor plan more realistic, add permanent fixtures.
Common examples include:
Kitchen counters
Sinks
Toilets
Showers
Bathtubs
Built-in wardrobes
Fireplaces
These features affect how people move through the space and should be represented accurately.
Use Standard Floor Plan Symbols
Professionals use symbols because they simplify communication.
Common symbols include:
SymbolMeaningDoor ArcDoor OpeningDouble LineWindowRectangleCabinetCircleLight FixtureStair SymbolStairsToilet SymbolBathroom Fixture
Image Opportunity: Complete floor plan symbols chart.
Including symbols makes it easier to convert your floor plan sketch into a digital floor plan later because the layout becomes easier to interpret.
Why Details Matter
At this stage, your hand drawn floor plan should communicate:
Room sizes
Room locations
Doors
Windows
Permanent fixtures
The more complete your sketch, the easier it becomes to transform it into a professional floor plan using an online floor plan generator.
Step 6: Label Every Room Clearly
Many beginners skip this step.
Don't.
Labels make your floor plan easier to understand and significantly more useful when sharing it with contractors, family members, architects, or renovation teams.
What Should Be Labeled?
Every room should have a clear name.
Examples:
Living Room
Kitchen
Dining Room
Primary Bedroom
Bedroom 2
Office
Laundry Room
Bathroom
Walk-In Closet
Even if a room seems obvious to you, label it anyway.
Add Room Dimensions
Whenever possible, include dimensions directly inside the room.
Example:
Primary Bedroom
14' x 16'
This provides instant clarity and helps others understand the scale of the space.
Label Special Features
Consider labeling:
Built-in storage
Utility rooms
Mechanical rooms
Staircases
Outdoor areas
The more information your floor plan contains, the more valuable it becomes.
Why Labels Improve Planning
Room labels help you evaluate whether the layout actually matches your needs.
For example:
You may realize:
The office is too small.
The laundry room is too far away.
The kitchen lacks storage.
The guest bedroom is oversized.
Labels make these issues easier to spot before construction begins.
Preparing for Digital Conversion
When users upload labeled floor plans into a floor plan creator, the conversion process is often faster and more accurate because room functions are already identified.
Step 7: Review Traffic Flow and Functionality
Now that your floor plan is complete, it's time to evaluate how people will actually use the space.
This is one of the most important steps in creating a floor plan without software.
Many layouts look great on paper but perform poorly in real life.
Imagine Walking Through the Home
Start at the main entrance.
Mentally walk through the entire house.
Ask yourself:
Is the entrance welcoming?
Are hallways wide enough?
Can guests find the bathroom easily?
Does the kitchen connect logically to dining spaces?
Are bedrooms private?
This exercise often reveals hidden problems.
Check Furniture Placement
Review every room.
Imagine placing:
Beds
Sofas
Dining tables
Desks
Storage units
Can people move comfortably around them?
A room that looks spacious on paper may feel crowded once furniture is added.
Evaluate Room Relationships
Good floor plans place related spaces near each other.
Examples include:
✓ Kitchen near dining room
✓ Laundry room near bedrooms
✓ Bathrooms near sleeping areas
✓ Garage access near utility spaces
Poor room relationships create daily inconveniences that become frustrating over time.
Consider Future Needs
Think beyond your current situation.
Questions to consider:
Will your family grow?
Do you work from home?
Will accessibility become important later?
Do you need extra storage?
A flexible layout often provides better long-term value.
The Visualization Challenge
This is where many homeowners encounter a major limitation.
A hand drawn floor plan can show measurements, but it cannot fully show how the finished home will feel.
You may understand room sizes but still struggle to answer questions like:
Will the living room feel spacious?
Is the kitchen layout practical?
Does the bedroom feel cramped?
How will natural light affect the space?
This is one reason why many people eventually convert their sketches into digital floor plans or realistic 3D floor plans.
A 3D model makes it much easier to evaluate design decisions before construction or renovation begins.
Common Problems When Designing a Floor Plan Without Software
Learning how to design a floor plan without software is valuable, but manual planning has limitations.
Understanding these limitations helps you avoid common mistakes.
Scale Errors
One of the biggest challenges with hand drawn floor plans is maintaining consistent scale.
Even small mistakes can result in:
Incorrect room sizes
Misaligned walls
Poor furniture fit
Construction confusion
A digital floor plan creator automatically maintains accurate proportions.
Difficulty Making Changes
Imagine you've finished a floor plan sketch and suddenly decide to move a wall.
With a manual drawing, you may need to erase and redraw large portions of the layout.
As projects become more detailed, revisions become increasingly time-consuming.
Poor Visualization
A flat sketch cannot fully represent:
Ceiling height
Room volume
Natural lighting
Interior design possibilities
This makes it difficult to imagine the finished result.
Sharing Challenges
Hand-drawn floor plans can be difficult to share with:
Contractors
Builders
Family members
Real estate professionals
Digital floor plans are easier to distribute, edit, and review.
Limited Furniture Planning
Without visualization tools, furniture placement often becomes guesswork.
Questions like:
Will the sectional fit?
Is there enough dining space?
Can the bed fit comfortably?
are harder to answer accurately.
No 3D Perspective
Perhaps the biggest limitation is the inability to see the space in three dimensions.
A 2D sketch provides measurements.
A 3D floor plan provides understanding.
This is why many homeowners begin with a floor plan sketch and later convert it into a professional digital model.
The combination of manual creativity and digital visualization often produces the best results.
How to Turn a Hand-Drawn Floor Plan Into a Professional Digital Floor Plan
Once your sketch is complete, you don't have to redraw everything from scratch.
Modern floor plan technology allows you to convert a hand drawn floor plan into a clean, professional design in minutes.
Instead of spending hours using complicated design software, you can simply:
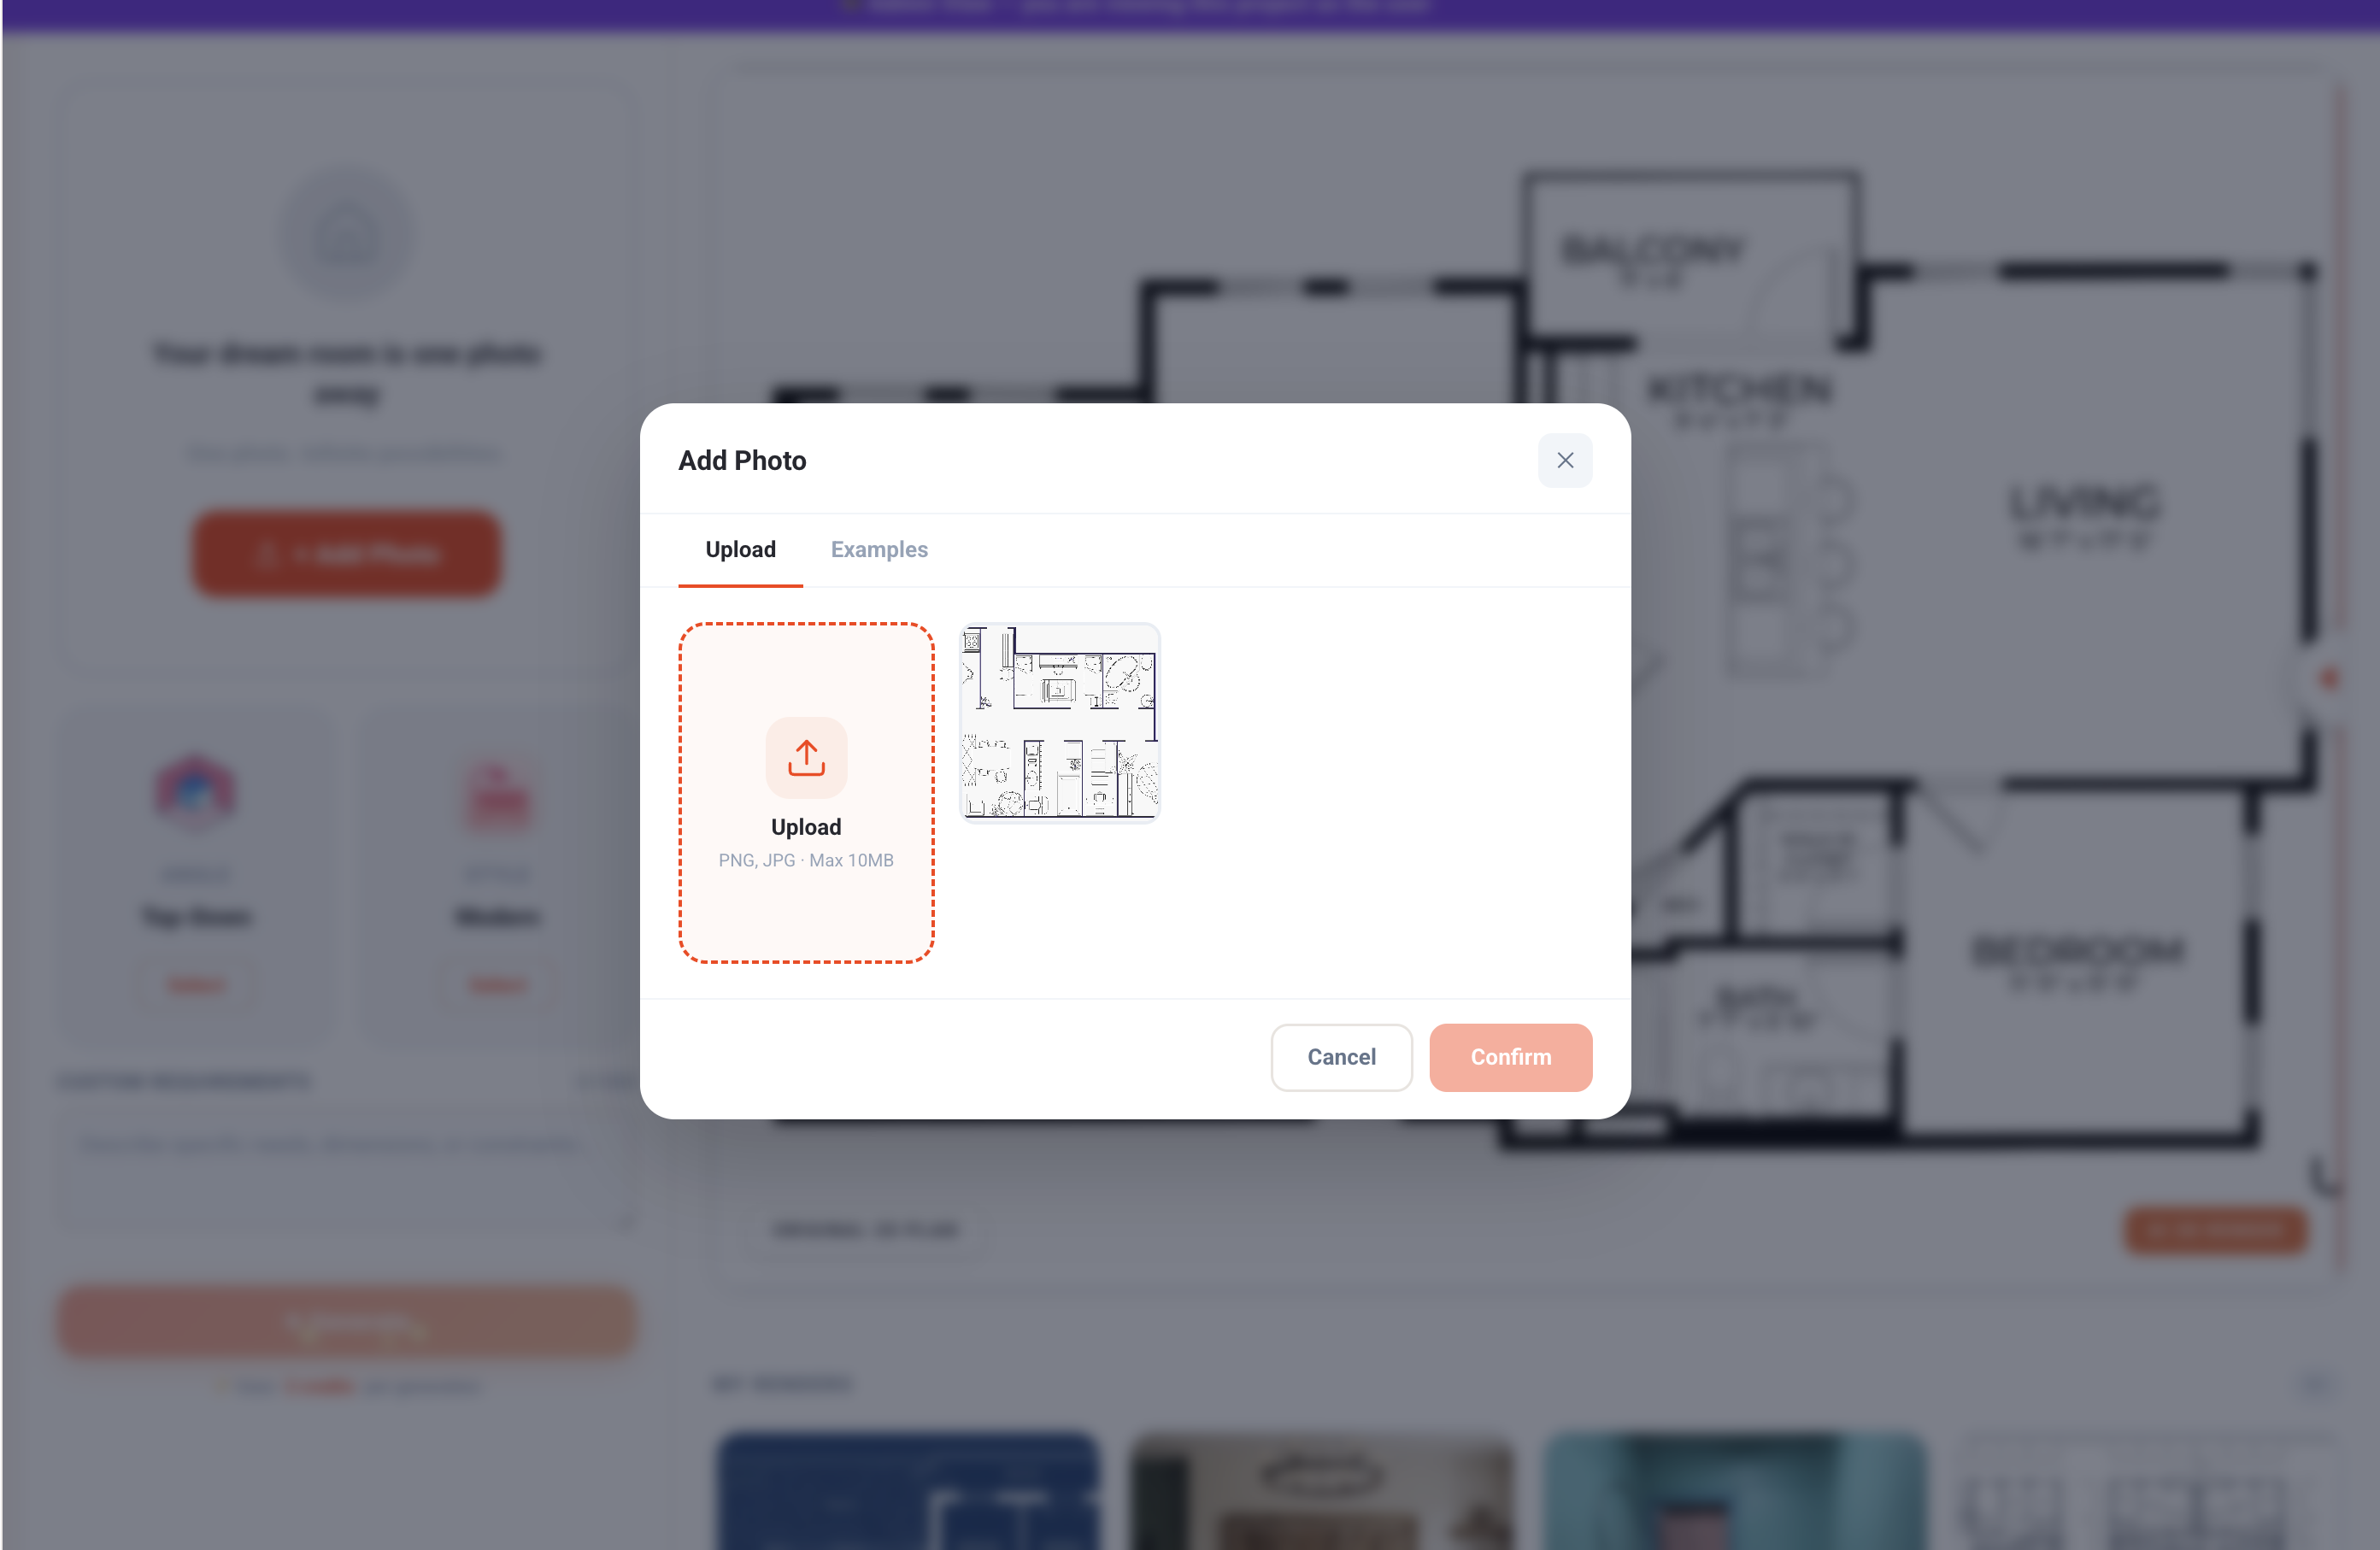
Step 1
Draw your floor plan on paper.
Step 2
Take a clear photo or upload your existing sketch.
Step 3
Generate a professional 2D floor plan.
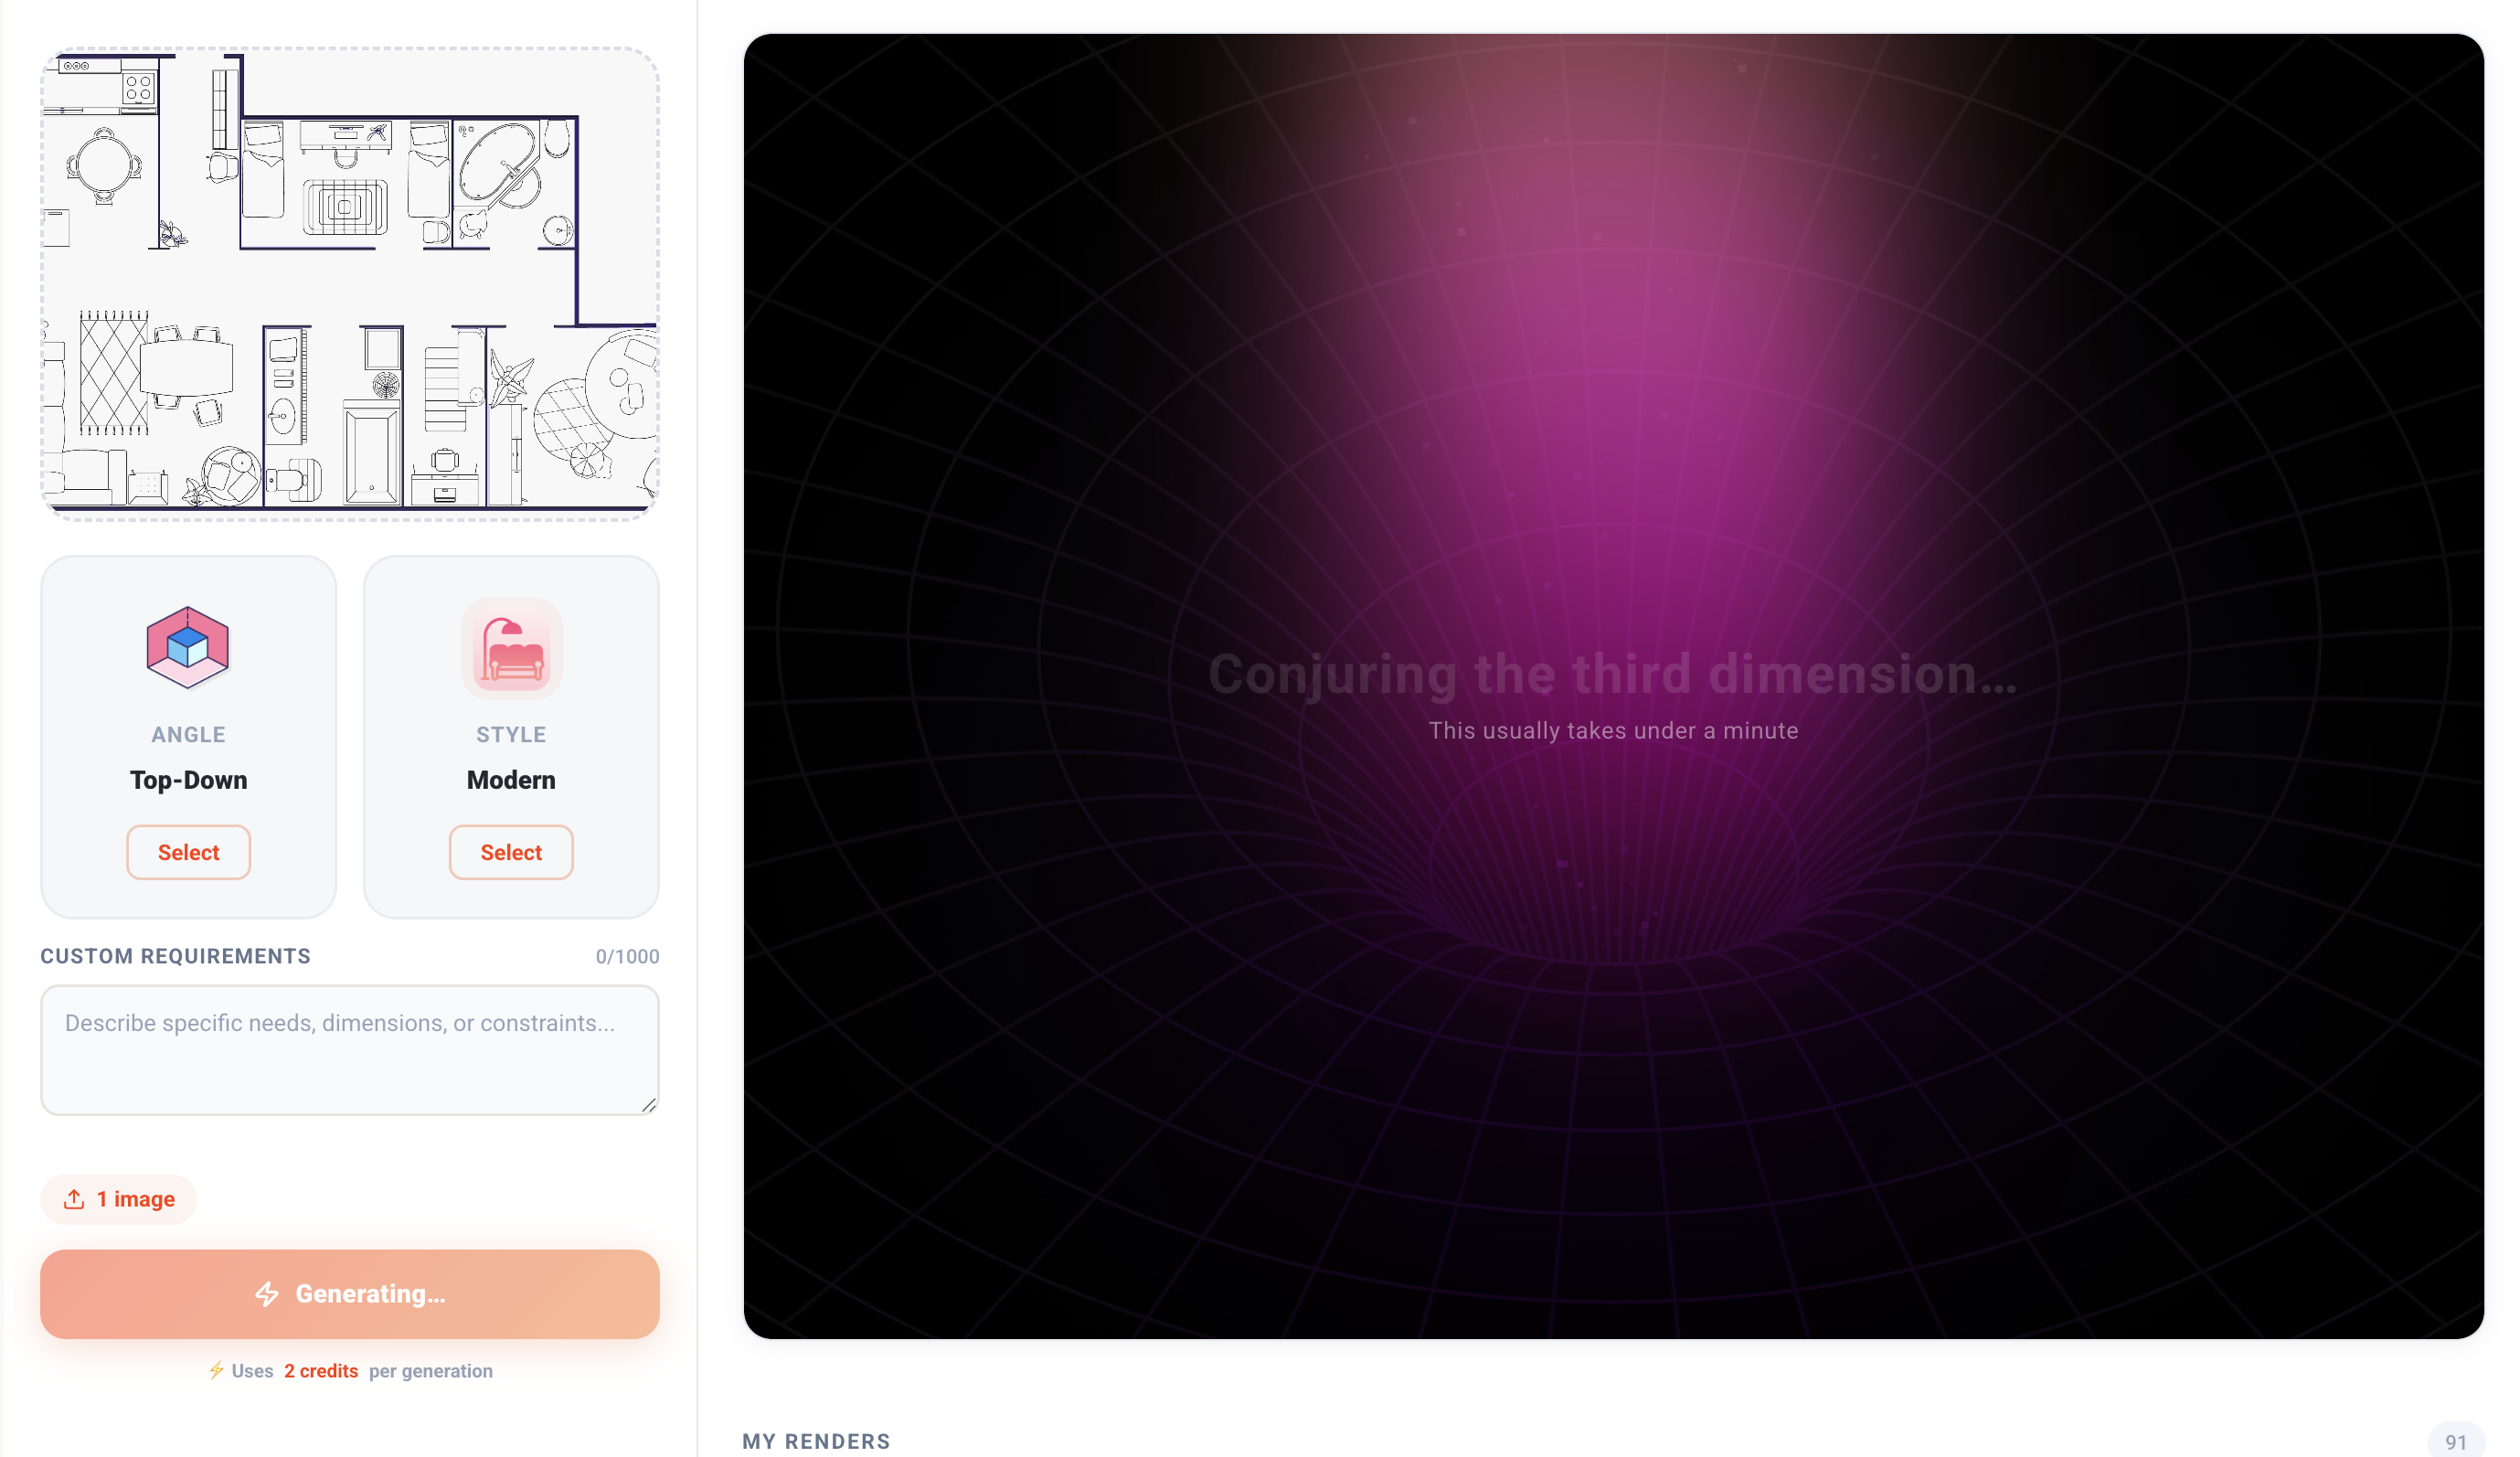
Step 4
Make edits digitally.
Step 5
Convert the design into a realistic 3D floor plan.
Image Opportunity: Sketch → 2D Floor Plan → 3D Floor Plan.
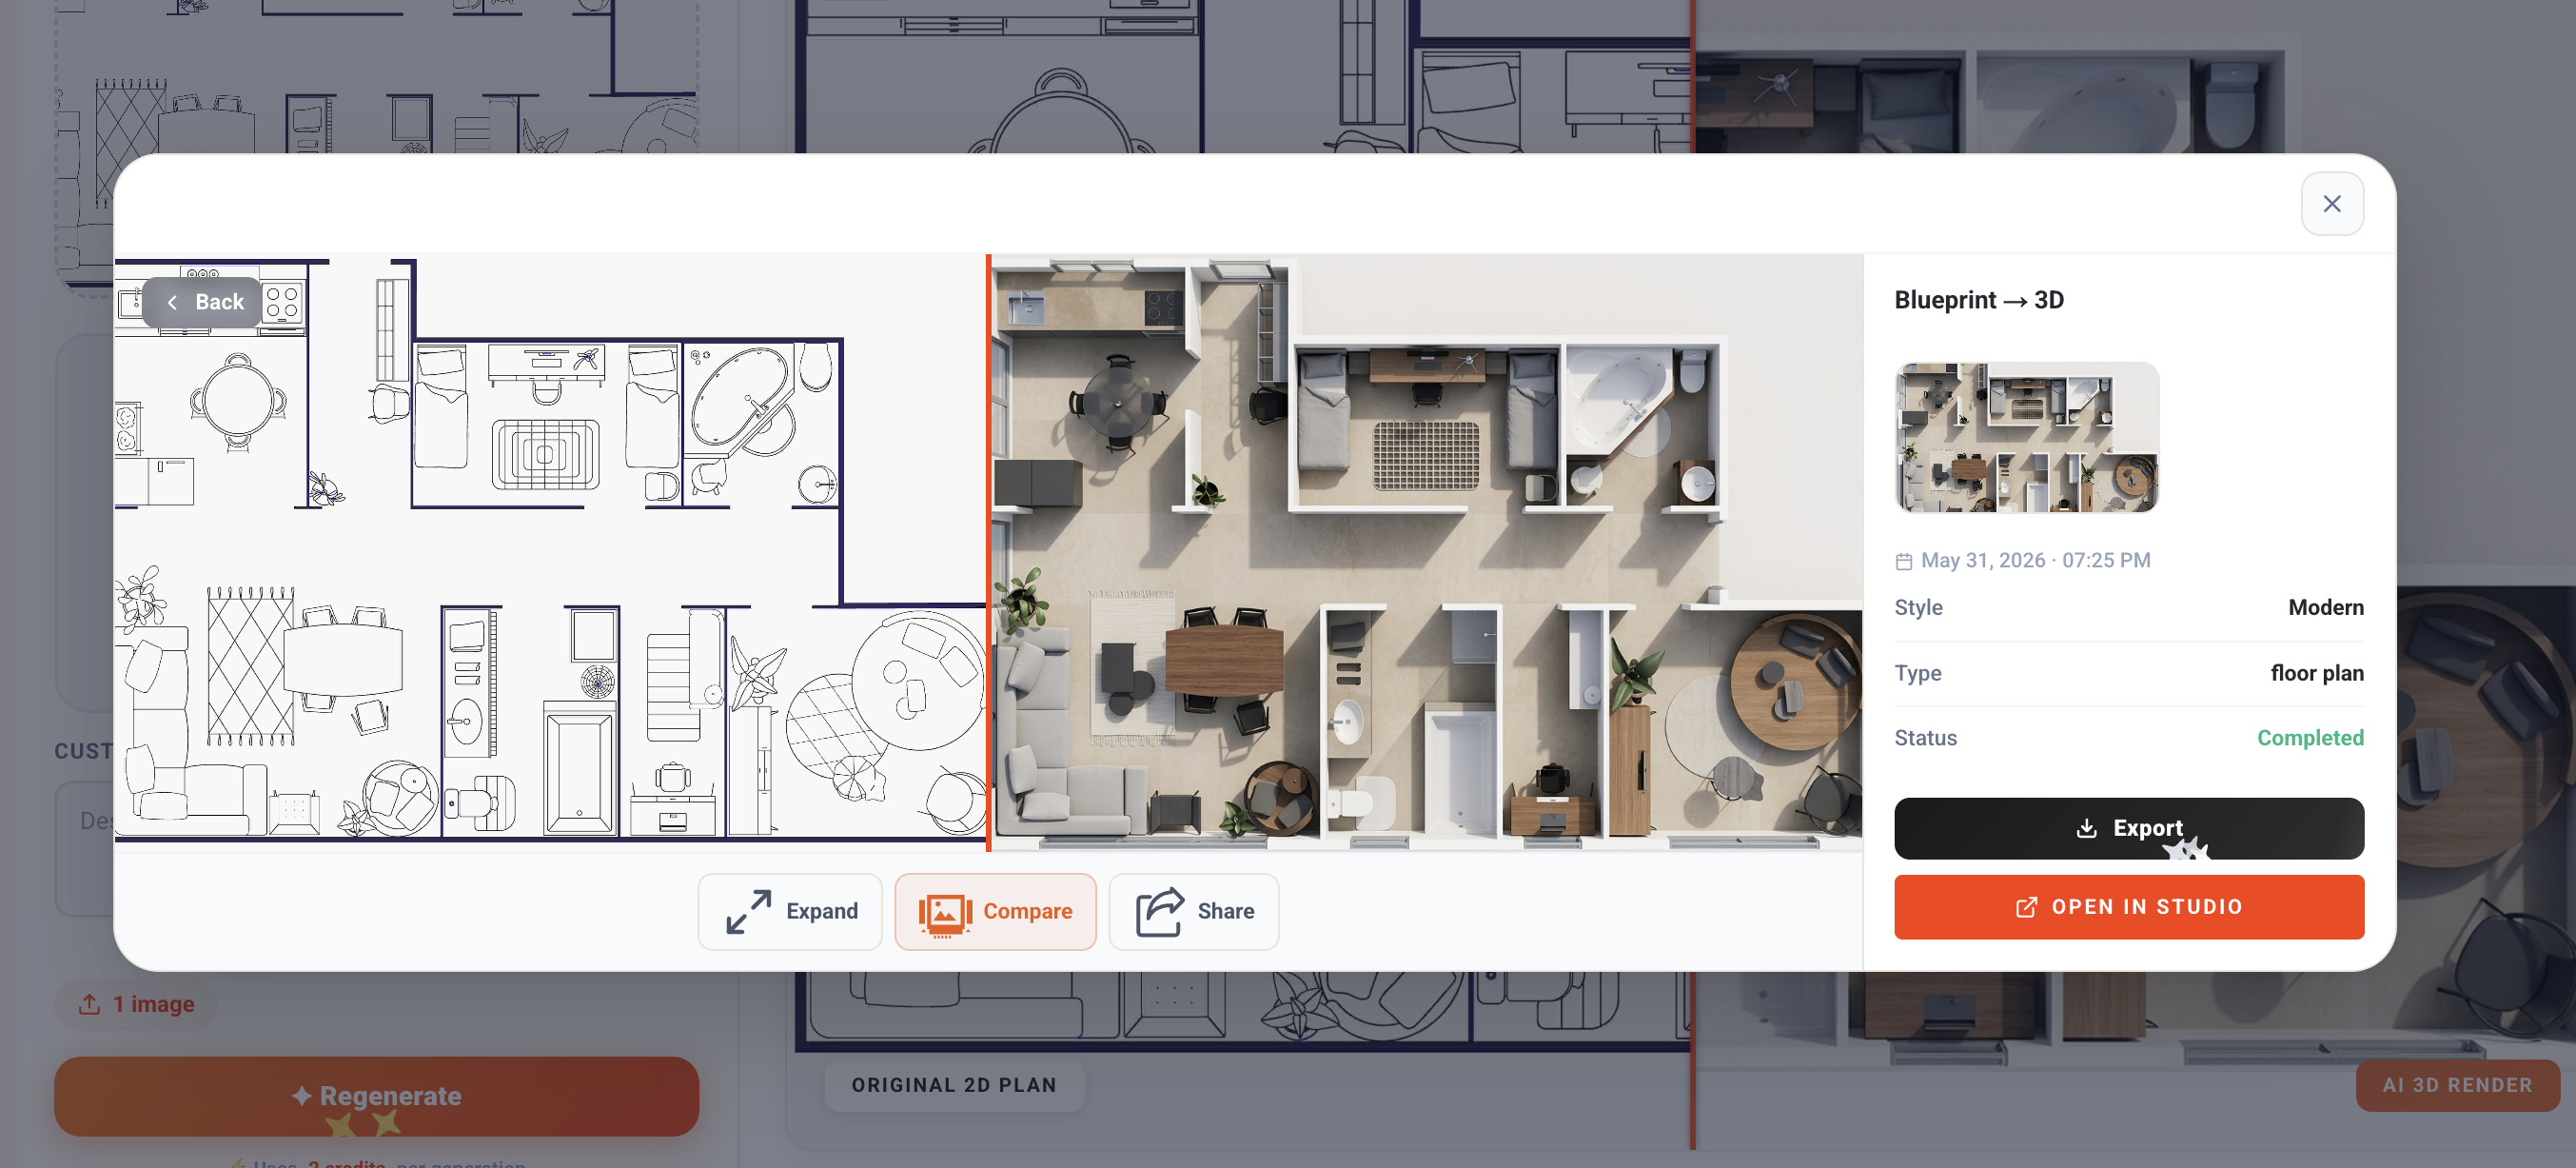
This process combines the simplicity of manual planning with the accuracy of modern design tools.
For many homeowners, it's the fastest way to move from an idea to a professional-quality floor plan.
The next section explores one of the biggest advantages of modern planning tools: converting a 2D floor plan into an interactive 3D model that helps you visualize your future space before construction begins.
Why Should I Convert My Sketch Into a Digital Floor Plan?
Digital floor plans offer:
Better accuracy
Easier editing
Professional presentation
Sharing capabilities
3D visualization
These advantages make them useful for renovation, construction, and real estate projects.
Conclusion
So, how can I design a floor plan without software?
The process is simpler than many people expect.
By using graph paper, accurate measurements, a ruler, and careful planning, you can create a functional floor plan that helps you explore ideas, organize spaces, and prepare for renovations or construction projects.
However, while a hand drawn floor plan is an excellent starting point, it has limitations. Making changes can be time-consuming, visualizing the final result can be difficult, and sharing plans with contractors or family members isn't always convenient.
That's why many homeowners choose a hybrid approach.
Start with a sketch.
Refine your ideas.
Then convert your design into a professional digital floor plan and realistic 3D model.
This approach combines the flexibility of manual planning with the speed, accuracy, and visualization benefits of modern floor plan technology.
Ready to Bring Your Floor Plan to Life?
Whether you have:
✓ A rough sketch
✓ A blueprint
✓ An existing 2D floor plan
✓ A renovation concept
You can transform it into a professional digital floor plan and realistic 3D model in just a few simple steps.
Get Started Today
Upload your sketch
Generate a professional floor plan
Convert a 2D floor plan into 3D
Visualize your design instantly
Share and edit with ease
Start creating your floor plan now and turn your ideas into a space you can actually see before construction begins.